You may not think of it when you’re posting pictures of your dog or your breakfast or your dog’s breakfast on Instagram, but there’s a dang science to them social media sizzlers. Scientists have gone and calculated the specific types of social media posts that garner the most attention, and they’re passing the savings onto you. They used like, beakers and test tubes and stuff. It was all very official. Peer-reviewed, even. Check out this link for the stats ‘n’ stuff:
With this in mind, I took some photos for Instagram, looking to capitalize on the trends of the times. But what are these trends, you ask? Well follow along, young gummy bear, and you will learn.
TEXTURE
Photos with texture get, on average, 79% more likes than those without. This is good because texture can be found almost anywhere – especially with the clarity slider in Camera Raw, or the Structure slider on Instagram. With these, you can pull out more detailed texture where it might not be obvious at first.
NEGATIVE SPACE
Photos with a significant amount of negative space accrue about 29% more likes than those that completely fill the frame. Negative space can be achieved in a number of ways, but the way I chose to go about it for these photos was to take close-up photos with my subject in the centre, and a shallow depth of field.
SATURATION
According to science, low saturation images get 18% more likes than those with highly saturated and vibrant colours. To be honest, I’m not sure why, because I feel like vibrant colours stand out more, but maybe it’s because when you’re scrolling through your feed and you’re lost in a sea of blurry scrolling colours, a low saturation photo will actually jump out. But the science is there, regardless.
DOMINANT COLOUR
17%. That’s how much more attention photos with a single dominant colour get than those with multiple dominant colours. This was probably the hardest series to get because today, no one in my friend group was wearing stand-out colours. The closest we had was Dawson’s pale blue shirt. So I tried to up the saturation and lower the colour temperature to add more blur into the shot, but the results were…mixed. Can’t win ’em all.
VIDEOS
I also posted a few short videos, which consist of behind the scenes shots from a video shoot I had the other day. I feel like behind the scenes videos are a great way to get engagement on social media because people want to know what the atmosphere was like “on set”, and they feel like they’re a part of the production when they get to see the funny bits in between takes.
I’m the guy behind the camera. That’s kinda been my thing since starting the Video Production program at Durham College. I’ve been in front of the camera in my YouTube videos, but even then, I’ve always then taken that video and edited it myself to bring my vision to life.
But I’ve realized over the course of this past semester that my immediate rush straight to the “camera operator” and “editor” positions has left a lot of my less experienced classmates as just that – less experienced. I love shooting and editing video so much that I’ve sort of hogged those positions, while my classmates who’ve barely touched a video camera don’t get the practice they should be getting.
With that in mind, I volunteered right away to be the subject of my group’s interview video project. I was out of my element, and it was kind of awesome.
I’m a better writer than speaker. This is confirmed.
First of all, I desperately need more practice acting and being natural in front of the camera, especially in a serious role like the interview we shot to promote our program. But more importantly, it gave my classmates a chance to practice their camera skills and editing techniques. And it took a weight off of me that I didn’t realize I was putting on myself.
With my work videos, I’m essentially doing everything myself, and the quality of the entire project hinges on me. And for a lot of school projects, I would take on everything because that’s what I was used to. But for this project, I relied on my group members to do the things I was used to doing, and they really came through and made some awesome stuff. And it was pretty neat to get to relax and not worry about the editing.
But just because I was the interview boy for this project, it doesn’t mean I don’t know how it was shot and edited. And now you will learn from me, little gummy bears.
We wanted to assault the eyes with some dope bokeh, so we used some Christmas lights and an 85mm prime lens to separate me from the background. Y’know what also helps separate a subject from a background? A hair light. So we used one of them suckers, too. I talked about my time in this program, and we shot for about 1-2 minutes of footage. Tegan was the mastermind interviewer, and she brought out her journalism expertise to conduct a 5-star interview.
A break in Tegan’s interview game face.
Chris was the camera operator, and he had the great idea to get some extra shots of just my face, to splice into the interview in editing. I’ve seen those kinds of shots in interviews before, but I never would have thought in the moment to get those shots. Chris was also our interview editor, and he did a great job with that, too.
No true project is complete without behind the scenes documentation, and for that we have Katie and D’Avray to thank for the phenomenal photos, and Dawson and Josh to thank for some grade-A B-Roll.
Please do not let this thumbnail affect your decision to watch this video. Or do. I don’t know you.
Overall, I’m super happy with how this project turned out, and I had very little to do with it. This is definitely a big step for me towards becoming more comfortable with giving up creative power. Soon I will be a fully evolved human creative boy and then I will be unstoppable.
SpongeBob was right when he said, “With imagination, I can be anything I want!”
When my Video Production group went into the product studio to shoot a little toy car on a white piece of felt, we didn’t know what end result we were in for. But with SpongeBob’s words of wisdom guiding us, we all came out of it with some dope photographs and a little magic in our hearts.
To be fair, our professor showed us plenty of example photos from professionals in the art of toy photography before we took a stab at it ourselves, so we sort of had an idea of what we were going for and what was possible. When we got into the studio, it was a group effort deciding on the scenery and setting up the composition and framing. The professor provided the car, the felt, the trees, and the powder (which I’ve been told is not actually cocaine). I provided the rocks and sticks, which I conveniently had in a duffel bag at the time. Maybe a future blog post will explain why I had sticks and rocks in a duffle bag. Stay tuned for that l’il gummy bears.
Witness the beauty of collaboration.
The photoshoot was fun enough, and it was pretty rad working with several people as well as my professor to take the best image possible. For most of my photo and video projects, I’m working on my own behind the camera, so it’s nice to get multiple opinions and input from people with different creative eyes. When all the shots are being called by just yourself, it can be easy to fall into a sort of creative lull, so this sort of collaboration can help push you to new creative heights.
But you know me – my true passion comes out in the editing. And boy oh boy, Dawson Allore and I edited up a storm to create that first picture up there. Most of the creative ideas came from Dawson, and I gave him a little bit of Photoshop knowledge to make his ideas look just a little better. It was a solid melding of the minds and I think it really shows.
Me and the boys juss chillen.
But that’s not all we did in the studio, oh no no no. We also shot some behind the scenes action and edited it to some sick beats. Check ‘er out:
Shot and edited also by Dawson
I’d actually never considered toy photography before this project, but now that I’ve done it once, I’m eager to do it again. I think it lends itself immensely to creativity in shooting and editing, which are the two aspects of this profession that I’m the most drawn to.
Beautiful, isn’t it? There’s nothing more satisfying to me than a crispy B-roll sequence. You could coat that B-roll in chocolate and sell it as a dang Coffee Crisp. This little slice of B-roll Heaven was brought to you by Peter McKinnon, aka the guy who has inspired me the most heavily in my shooting and editing style.
There’s a certain appeal to B-roll that I think is universal. It can tie together and transition between different scenes in a video, or it can tell a succinct story in and of itself. Of course, it has its technical uses as well. It’s crucial to break up the visual monotony of an interview and mask cuts, or to provide an establishing shot for a narrative. Because of this, there’s almost always a reason to capture B-roll for any video shoot. And there’s absolutely an art to it. The most interesting B-roll shots are captured by people who go out of their way to get into the most creative positions, even if that means crouching awkwardly behind a fold-out chair, peeking their camera back and forth at a badminton team while half of them stare at you like you’re crazy. You’re not crazy. You’re inspired! But you also might be crazy. I don’t necessarily know you all that well.
Not crazy.
So why are we here, my little Haribo gummy bears, reading this blog right now? It’s because I mentioned money in the title, huh? I respect that. You wanna make it on your own steam. That’s great.
“I respect that. You wanna make it on your own steam. That’s great.”
Norman Osborn, 2002
For the last seven months I’ve been working as my college/university’s Video Coordinator. On top of shooting game highlights, this job mainly consists of shooting and cutting together B-roll videos to promote different sporting events or achievements. The entire reason I was hired was because I made a random B-roll sequence of a literal walk in the park, the first week I had my camera. I cut it together and then sent it in with my application and they hired me on the spot.
I just rewatched it to find a screen grab and this is the best I could do.
This is not to brag. It’s just to let you know that jobs are out there that you might not immediately associate with B-roll, and sometimes, a random video you’ve put together for fun could end up securing you a job and allowing you to live out your days as a student without having to comb through the recycling bins after class for nutrient-rich discarded muffin wrappers.
But in case sports aren’t your particular flavour of Smucker’s, here are a few different avenues you can explore that involve B-roll:
Stock Footage
This is actually something I never considered until researching for this blog post. There are stock footage sites that are just dying to pay you for your B-roll footage. This may be a slight exaggeration. But for real, there is potential extra spending money just sitting on your hard drives right now, even just from B-roll of old projects. You could set up a whole muffin budget with that!
This doesn’t necessarily mean
starting your own YouTube channel. YouTube is a tough nut to crack, and making
any money from it can take a very long time. My boy Peter McKinnon is a big ol’
success story in that regard, but there are other options out there. Some
YouTubers are actively looking to hire people for videography. A lot of these
YouTubers are lifestyle and travel vloggers. These sorts of channels thrive on
massive amounts of B-roll of their main personalities and exploits. If you show
them that you can capture that B-roll and cut it together into sequences that
are downright entrancing, you never know what opportunities might open up.
Admittedly, that video is about a month old at the time of this blog post, but the job posting is still up, and there are more where they came from. And sometimes, there are opportunities in industries that you might not initially expect to venture to YouTube. This brings me to my next point.
Real Estate
Another viable field that I never really considered until 20 minutes ago, real estate just makes sense when you think about it. A solid B-roll sequence can make literally anything interesting, and when an agency wants to drum up interest in a location they want to sell, it’s B-roll to the rescue. That first Peter McKinnon video I showed up at the top is a perfect example of how to show off a room and give it kind of its own personality. And this real estate idea isn’t just me theorizing either. I wouldn’t spout this stuff without some references now, would I?
This is a job posting for a real estate company that is making a foray into YouTube. B-roll skills are invariably an asset in a position like that.
Sports/Events/Small Businesses
This is the one I have first-hand experience in. My job, and with how long the videos can take to edit, sometimes it seems my life, is all about capturing and editing B-roll of sports events. What it really comes down to is generating interest in an event, a service, or a product. If you can make a video visually striking and entertaining enough to hold someone’s attention, even if that person had never even heard of or cared about the subject beforehand, then there’s a market for your skills.
But where do you look to sell your craft? If you’re a student, then there’s a good chance that your campus sports teams and other departments may have opportunities available. But if those paths aren’t open to you, don’t be afraid to seek other clients for yourself. I know people who have literally gone to small business owners of places like clothing shops and shoe stores, and straight up asked if they could shoot a promo video for them. Of course, if you have some sort of relevant demo reel you can show them, it helps a lot. But if not, you can always opt to shoot a short example for them for free. If they like it, then you can do a more in-depth one for a price. If not, you go on your merry way, except now you have precious B-roll footage in your possession, and you can use it to persuade future potential clients.
At best, you get yourself some cold hard cash, at worst, you gain some knowledge and experience.
My first college sports B-roll sequence. Kinda icky.
My most recent college sports B-roll sequence. Kinda FREAKING RAD.
So at this point you’ve read 1100 words ‘o’ mine, and you’re all hot and bothered by the idea of making some B-roll bucks. But Ryan, is my B-roll good enough? How can I improve? Fear not, dear reader, for I will now answer your query and bequeath upon you some tips and guidelines to help make the B in your B-roll stand for “Better”. That joke was kind of a reach but I’m helping you out here, so you have to laugh as like a courtesy thing. I’m not above it.
Music
I’m listing this first because to
me, there’s nothing more important than the right song choice. There’s also
nothing more important than people being able to see your video without it
getting taken down for copyright infringement. So first thing’s first, get
yourself a song that you have the license to use. Here are a couple of resources:
There are also songs you can find on YouTube on channels like Free Vibes or NoCopyrightSounds, you just need to make sure that you read the descriptions and follow each channel’s instructions on how to credit the song, and under what conditions you’re allowed to use it.
Once you get past the licensing, you can start thinking creatively. Find a song that fits the mood you’re going for. If you’re planning on a lot of hard cuts and high energy, you might want to find something with a solid beat you can cut to easily. If you’re going for something slower, with more smooth transitions, you might opt for a more relaxed song.
Variety & Creativity
As much as possible, go for a wide
variety of shot types. I gravitate towards close ups, but I always make sure I
get a good amount of medium shots, long shots, and full blown wide-angle
extreme long shots, among others. It’s nice to show the full scope of a scene,
and also be able to focus in on some of the details.
Beyond the standard shot types, always, ALWAYS be looking for the shots that no one else would think of. As an example, one of my favourite things to do when shooting B-roll is to shoot through or around something. So sometimes I’ll be pressed right up against a curtain and slowly peek out at a subject, keeping the curtain out of focus in the far edge of the frame. This can really amp up the composition of your shot. It can also get you weird looks. Ignore them. You’re a stallion of the cinematic arts. They simply do not understand your majestic ways.
Replace curtain with badminton trophy and you get this.
On top of this, shoot at different angles. Find different vantage points. If you can make the viewer ask themselves, “How did they get that shot?”, you’re doing something right.
Slow Motion
I’ll admit that I might have a slight reliance on slow motion footage. I’m trying to work more real time footage into my videos, but a smooth, sharp slow motion shot of just about anything can look just supremely cinematic, and it’s really hard to pass up. So just keep in mind that you’ll want to be shooting at at least 60 FPS to get smooth slow motion for your end product. The higher your frame-rate, the slower you can make your footage.
Just Move
This might come down to a stylistic choice, and it might not be appropriate for all situations, but I’ve personally found that adding some kind of movement into a shot almost always makes it look better. Even if it’s just something like a very slight truck or pan from left to right, or the gentlest of dolly shots, movement adds interest. I find this to be especially true if none of the elements in your shot are moving on their own already. This also ties into my point about shooting through or around objects. If you’re focused on something in the distance, then a slight camera truck (full camera movement left or right) may not really be noticeable. But if you have something like a person or a fence or a badminton trophy out of focus in the foreground, all of a sudden your slight movements have a much more noticeable effect and add a lot more life to the shot. I’m getting excited just writing about it.
Stabilize
What I find to be the most telling distinction between amateur and professional B-roll is how smooth the shots are. You might have an amazing and inventive shot idea, but if your camera is in the midst of a 9.0 earthquake while you shoot it, that’s all anyone will notice. The expensive fixes for this are gimbals and Steadicams and to a lesser extent, monopods, but not everyone has access to these – including myself. But a little birdie named Peter McKinnon has taught me that there are plenty of tricks you can use to stabilize your shots without these gadgets. My personal favourite methods are:
Pull the camera strap tight against your neck while holding the camera out.
When going for that smooth dolly shot, stand in place and lean into the shot slowly, all the way to the point where you start to lose balance. Make sure you catch yourself before you fall. That step is very important. The shot leading up to the moment you lost balance should be much smoother than if you were to try to shoot it with just arm movement.
Warp Stabilizer – This is a post-processing effect, and it can be hit or miss. Sometimes it introduces way too much of the gross wobblies, but sometimes, even if you turn the effect down to something like 6%, it juuuust ever so slightly smooths out the little wrinkles in your already pretty stable footage.
Check out Peter McKinnon’s full tutorial on these methods HERE!
Shoot Long and Shoot Lots
One of the biggest issues I’ve run into when working with others’ footage, is that they start shooting too late, or cut off a shot too early. I’m guilty of this myself sometimes, and it’s always something to keep in the back of your mind and improve on. You never know what exact length or section of a shot is going to fit perfectly in your video, so it’s always a good idea to get more than you need. That goes for the quantity of clips as well. You can never have too much B-roll. That sentiment is actually so important to me, I might have it engraved on my tombstone.
Alright people, I think that’s enough out of me for one post. Did anyone even make it this far? I may have lost my last reader when I quoted Norman Osborn. That’s a risk I’m going to have to take. Hopefully I’ve helped at least one person learn a little something about B-roll with this post. Stay tuned for my next post, which will significantly increase the Spiderman quote to useful content ratio.
These are words that many of us have heard at one point or another. But what’s so great about eyes, anyway? Why doesn’t anyone ever say, “Hey! My nose is up here!” or “Hey! These earlobes aren’t gonna look at themselves” or “Please stare at my jowls”? Well, turns out, eyes are pretty dope.
With this in mind, I decided to create a portrait series that focuses on what I find to be the most expressive and unique aspect of any given face: the eyes. “Windows to the soul” they call them. And who am I, if not “them”? Check out my new Behance project – Windows:
Now, I’ll let you in on a little secret: I’m not the most eye contact-prone individual. When I’m talking to someone, I’ll make periodic eye contact, but I don’t often hold it for long, especially if we’re standing particularly close. If you want to put a romantic spin on it, you could say I’m just avoiding getting lost. Because if I do, I’m certainly not asking for directions.
“Get lost!” they say to me.
But that’s a real shame, because I’ve been sleepin’ on so many people’s rad eyeballs. And it took creating this series to really make that fact sink in. I’ve come to really love how unique and striking literally everyone’s eyes are. Once you know someone, you can immediately identify them by a photo of their eyes. It’s kind of nuts how instantly telling they are. You think if you saw a picture of your best friend’s nose, you’d immediately know it was them? Probably not, unless they’re in possession of a really unique schnoz. But eyes are defining. Not just in colour, but in shape, angle, soul… I sat here for a few minutes trying to think of what to call that kind of indefinable quality that varies from eye to eye. I considered calling it “The Pierce Factor” but that just sounds like it’s referencing some guy named Pierce, so I went with “soul” instead. I guess there is some truth to that old saying.
A friend once told me they’ve never seen an ugly eye. I am inclined to agree. And for that we need to thank the eyelid, the eye socket, the entire housing around the eye, really. An eyeball just like, sitting out on the coffee table would not be nearly as beautiful. It’d probably leak on the coffee table books, and no one would want to pick it up and move it, because it’s an eyeball, so you’d just let it slowly ruin your books and pretend like it’s not ruining brunch.
“You’re lucky I’m inside this head!” they say to me.
In case you ever want to capture your own super-detailed eyeball photos, here’s how it went down:
Lighting
To create this series, I had to make people cry. It was an unintended side effect, rest assured. In the studio, I initially tried lighting the subjects with a softbox on either side of the camera. I ran into a Catch 22 situation wherein, when the softboxes were too far away, there wasn’t enough light, but when I brought them closer, giant catch lights showed up in the subjects’ eyes that were distracting. And so I had to make some changes. I took the softboxes off of the lights, which made them much harsher, and much brighter. Normally this wouldn’t be ideal for portraits because it’s less flattering on the face, but I didn’t care about all that unnecessary face real estate for this project. I just needed to light up those sweet vision balls. Turns out the brighter you light an eyeball directly, the more detail shows up in the iris. Especially true for lighter eyes, this is how I captured the intricate, colourful details woven into the eyeball jelly. It also made two small catch lights on either side of the pupil, which I thought was pretty neat, and much less distracting than the softboxes.
Spoiler Warning: Beauty often comes at a cost.
Unfortunately, this setup also burned searing daylight directly into my friends’ eyes. Some of them, including myself, teared up almost immediately, and soon after, our eyes turned red. Not a great look for a photo. Also maybe physically damaging. Both situations are not ideal. But we pressed on and set it up so that the subject only had to open their eyes for a second or two at a time. I’d take the photo, they’d close them again, I’d apologize, and then we’d move on to the next person. It made me appreciate my friends for willingly doing that multiple times until I got a shot I was happy with for each of them.
Lens & Camera Settings
For this kind of detail, I used a 100mm Canon macro lens. I’ve always really liked macro photography, ever since I discovered the macro settings on my older sister’s point and shoot camera at 11 years old and spent the next two hours taking pictures of blades of grass in her backyard. But this was my first time using a proper macro lens and boy howdy, it was something special. The lens was capable of an aperture of f/2.8, but since human beings can never sit perfectly still, trying to get even one eye in perfect focus, let alone both, was nearly impossible. Even at f/6.3, the aperture I ended up settling on, it was difficult. Macro lenses have notoriously shallow depth of field.
Post-Processing
My favourite aspect of any photoshoot is the post-processing. I’m an editing guy, and before I even started taking the photos, I knew how I wanted the end product to look. Black and white, high contrast and clarity, with deeply saturated colours in the irises. I made my idea a reality in Adobe Camera Raw with masks and sliders, and the results were actually better in some cases than I’d even imagined. Some interesting results cropped up along the way, though. I learned just how different blue eyes can be. One person’s eyes, the lovely Tegan Sonley, are a really light, pale blue. When I bumped up the saturation, they turned straight up purple. So much so that I had to add some blue back in manually with the colour temperature slider.
OG Purple
New Blue
Meanwhile, I thought that I had a pretty pale blue/grey eye colour, but when I dialed the saturation up on my eyes, they turned half gold/half grey. I’m not complaining.
“6’1″ w/ Steely Gold Eyes” will go over great on Tinder.
I debated whether I should manually adjust the eye colour, outside of simply adding saturation and contrast, because I wanted the shots to be an accentuated but true-to-life representation, but in the end, I found that adjusting the colours the way I did made them look more like they do in real life.
So that’s Windows. I really like this series and
want to continue it with anyone who will allow me to assault their eyes with
harsh studio lights. I think everyone can appreciate a cool-looking shot of
their own eyes, and I get a lot of satisfaction out of seeing how awesome I can
make them look in post, so it’s really a win-win for everyone involved. Maybe
if I get enough of them, I’ll make a book someday. But until that day, I’ll
just be the guy who makes people cry in the studio.
Nah, just kidding. Virility? Here? Never. It was all just a ploy. Clickbait, if you will. What we’ll be talking about today is VIRALITY.
Because this week, my friends, I’ve been tasked with creating a viral video. Or at least, a video made with the intent of going viral. It’s “unlisted” on YouTube so the general public might have a hard time finding it. But not you, my little Haribo gummy bears. You get a front row seat to virility. I mean virality. Yeah.
Nothing virile about this.
So let’s break this down. The very first thing that a person will see of pretty much any video is the title. A video about a man punching a real life tree into Minecraft blocks is, let’s face it, a stroke of genius. But nobody will watch it if it’s called “sad man hits a tree a bunch”. I mean I would, but the general public? Hardly.
That’s why my group went with a classic clickbait title that directly dares the viewer not to recreate it. People will see that and be like, “Pshhh, I bet it’s not even that dangerous. I could totally do this thing.” And then they watch it. Of course, the remainder – “Man Explodes Tree with ONE PUNCH!!” is also quite helpful, because:
a) It appeals to mankind’s love of explosions. b) It piques their curiosity as to how a man exploded a tree. c) It includes “ONE PUNCH”, and One Punch Man is the hypest show and everyone loves it, don’t @ me.
Once you pass the title, you get into the meat of the video, which is the video. There are many different avenues that a video can take to reach virality – humour, polished production value, emotional manipulation, sex appeal, a genuine message to society, just to name a few – but nothing is a guarantee. You do what you can to give the video a leg up, but in the end it’s up to the public to look at that leg and say, “I like what I see.”
4 million views.
We wanted to focus on humour as our pathway to success. Specifically the kind that takes you by surprise. I wouldn’t say it’s laugh out loud funny, but it’s one of those videos where you let out one single “Heh” as you realize you just saw something pretty neat. Something pretty shareable on Facebook. Something that Facebook moms will see and think is real because they don’t know what Minecraft or jokes are.
In order to create something of this neatitude, I had to dig into my bag of visual effects and try something I’ve never done before: 3D modelling. Luckily for this video all I had to model was a cube, but we all start somewhere. We purposely combined these impressive visual effects with lackluster video production elsewhere. We didn’t want it to look like a cinematic production (but trust me, I was itching to colour grade it). We wanted it to look like this guy was just out taking pictures and he happened across this guy. Also he may have died at the end which would make this found footage. Either way, it’s reminiscent of classic viral videos such as:
When Superman has to leave before he’s done changing.
I’d also like to point out another creator whose visual effects have inspired me to start with this simple cube track, and eventually work my way up to his level. His name is Kevin Lustgarten and he is creative and wonderful:
I don’t even understand half of what is going on in this video.
So I think the main thing it boils down to is the juxtaposition of starting with what looks like basic footage a random guy shot on his camera, and then ending with 3D tracked visual effects and explosions. It’s that surprise that catches people off guard and they want to share it with other people to see if they’re also caught off guard. So you see, the secret to virility has always been the element of surprise, and a healthy explosion.
Sorry, virality. Wow, how embarrassing.
Also, thank you to my video boys Dawson and Josh for helping to make this video, and to Dawson for creating that dope Minecraft Creeper costume on a day’s notice.
In building my portfolio as a creator, I’m always looking for inspiration from others who see the world differently than I do. In doing so, I came across a Toronto-native named Benjamin Von Wong.
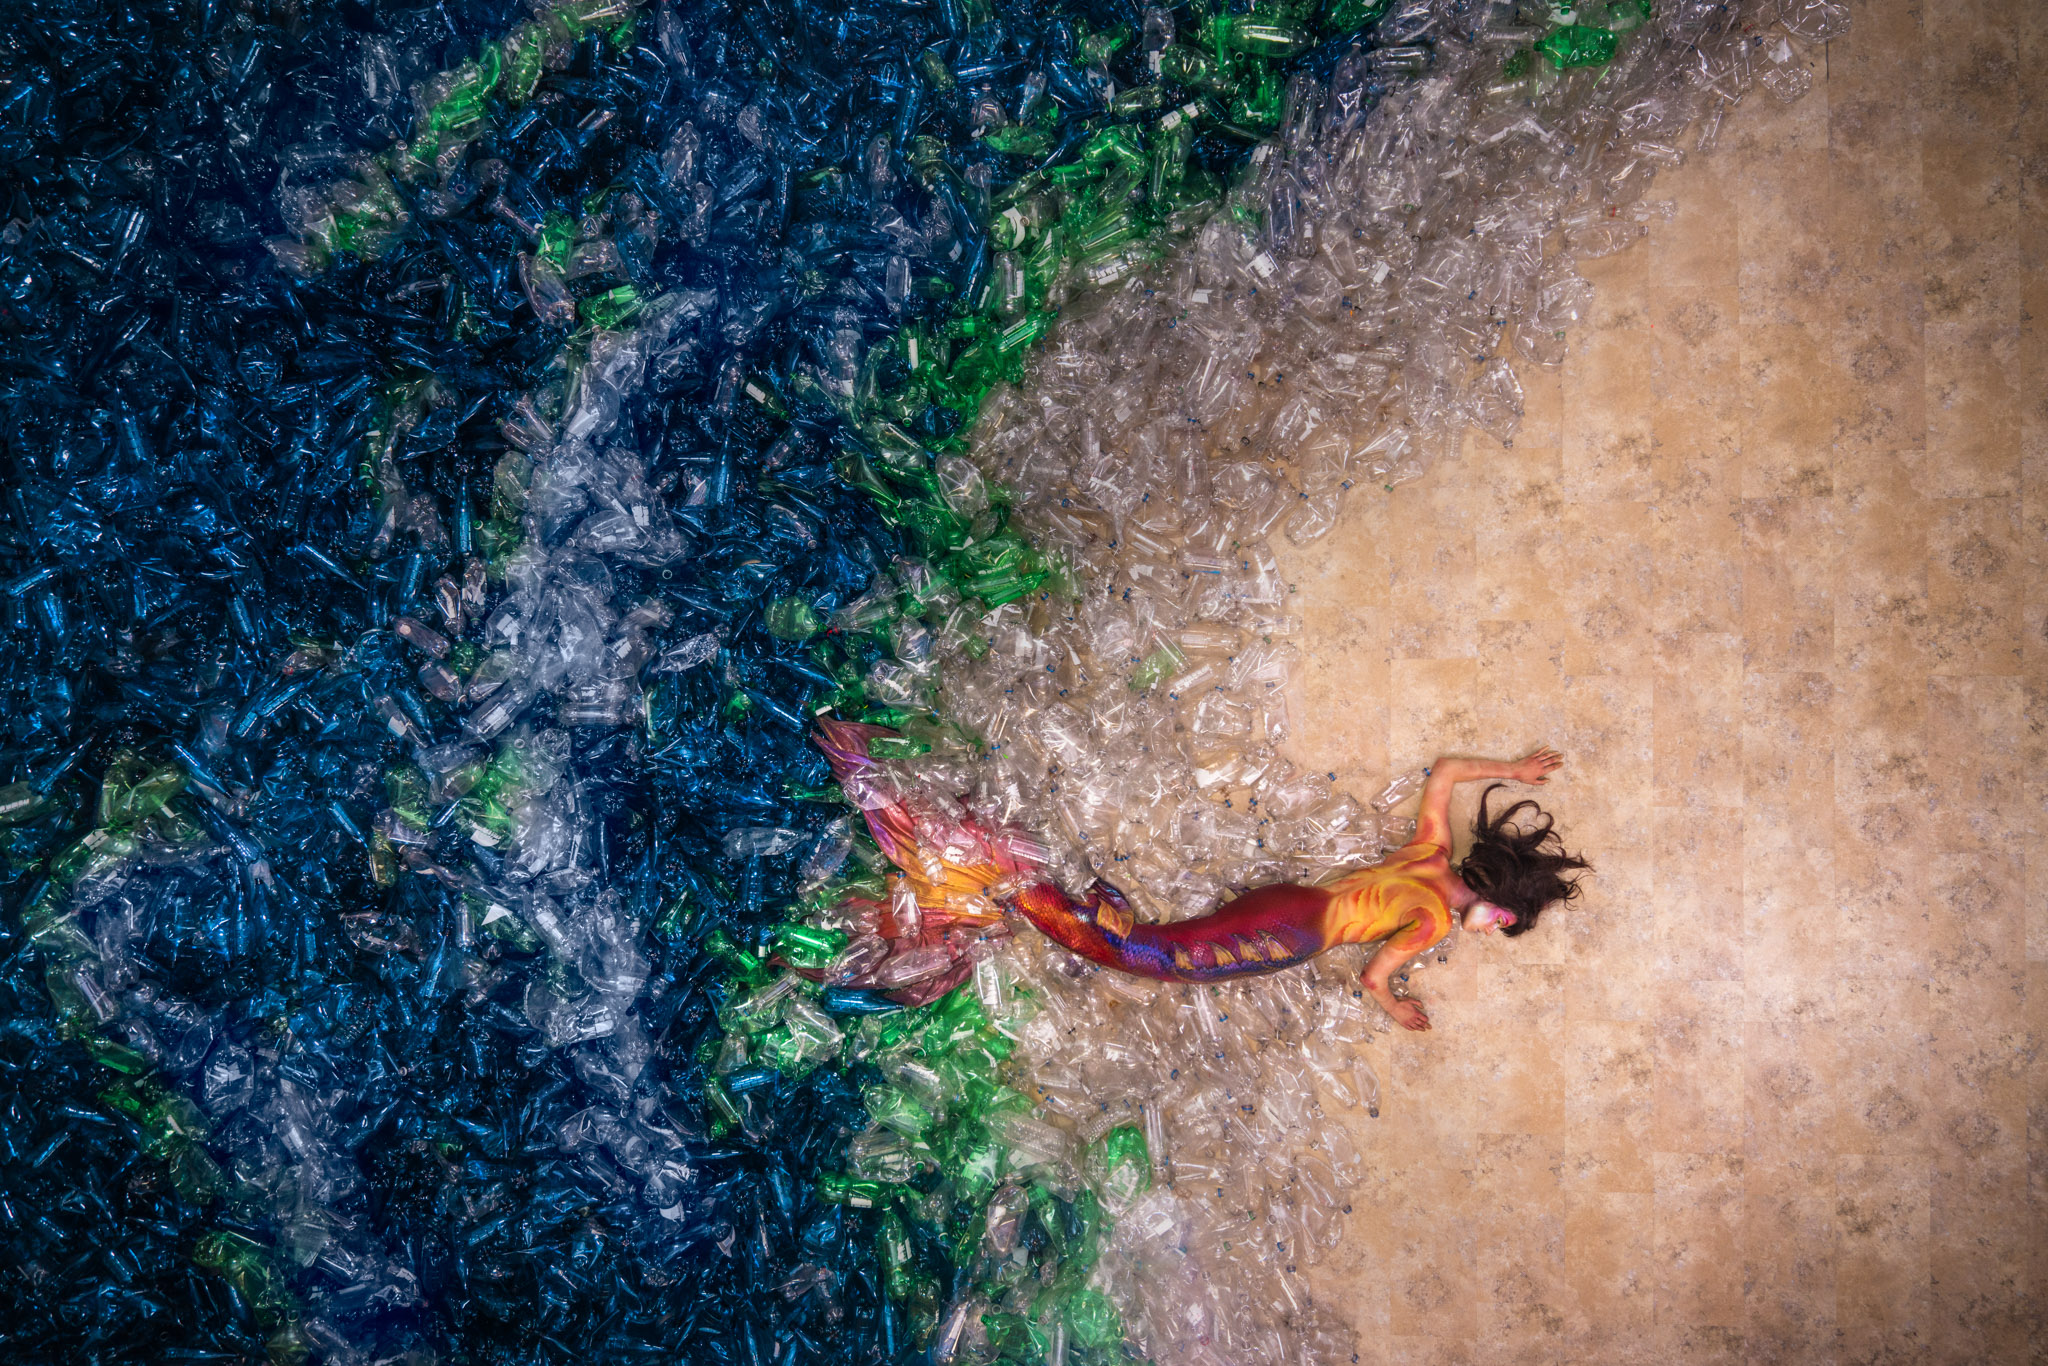
Back in 2016, Von Wong made the decision to become a fully “social impact” artist. His work is fully dedicated to a cause. Whether he’s showing the impact of plastic waste in the ocean by surrounding a mermaid with an ocean made entirely of plastic bottles, or raising awareness for preserving shark life, he finds a way to inject incredible creativity into supporting a cause.
Definitely thought this was photoshopped at first, but nope.
But a great cause needs solid marketing, and so I took to the internet to see just how my man Benjamin gets the word out.
From a Google search of just “Von Wong”, his official website was the first link I found. From just his homepage, you’re hit with an onslaught of images, organized chronologically for each one of his projects. I noticed that he includes both his final images here, as well as quite a few behind the scenes posts. He doesn’t shy away from letting people in on the secret of how he captures the images he does. Instead, he realizes that this sort of “inside source” draws people in even more. They’re not just fantastical images – they’re tangible projects that dozens of people worked on, and they worked on it for a reason.
His site also includes a “How It’s Done” page, with behind the scenes videos for each project, which are all really well done, and have very enticing titles.
One such BTS video
His blog page features detailed stories of how the projects unfold and what their cause is. Plenty of pictures really serve to draw people in and keep them reading to the end, where he links his crowdsourcing campaigns. By that point, you don’t feel like he’s throwing the crowdsourcing in your face. By that point, you’ve read through his journey and taken one of your own, and now you’re invested.
He also updates a 500px page. This page seems to showcase primarily his completed, final images. But for each one, he’ll provide a link to his blog to show how these images were captured and edited, again always referring back to the greater cause behind the idea, and detailing how you can get involved.
Then there’s his Instagram. This outlet tends to be more of his BTS photos, as well as some of his completed work. I’ve noticed that he really uses Instagram to detail the cause behind his work in a way he can’t really do directly on 500px or the home page of his website. Since so many people use Instagram who may not know of his 500px page or his blog, this is a great way to reroute people over there. He also uses it to detail the amazing work of the people he collaborates with.
Of course, he has the classic Facebook and Twitter combo, but it seems that these pages also serve to reroute people to his website, where he does the bulk of his marketing.
From all of this, I’ve deepened my appreciation for blogs and personal websites. But Benjamin has also furthered my desire to produce content that symbolizes something greater. And going forward, I’ll be more knowledgeable about how to spread my message to a wider audience.
Leading lines is one of my favourite compositional elements. I don’t know what that says about me. Maybe that I like structure? It’s probably a big reason as to why I like architectural photography as well.
Lines are everywhere – from landscapes and architecture on the grandest of scales, to tiny patterns hidden in plain sight. My first Behance project showcases some of this range. I wanted to find and capture leading lines that aren’t necessarily the most obvious, or the most stand-out. This is why I included a close up of an electronic display board:
Now available as a Windows 10 desktop background
As well as a shot showcasing the lines of a building on the Durham College campus:
The clouds in the window reflections are top. notch.
Hello, fellow classmates and any sorry saps who’ve randomly stumbled on this blog. My name is Ryan Beaton, and I’m into videos and stuff. So far I’ve gravitated towards B-Roll, but I’m very interested in both high production cinematography, as well as simpler productions like YouTube sketches and gaming videos. I tend to prefer the post-production side of things – my biggest inspiration being the YouTube channel “Funhaus”, an offshoot of Rooster Teeth. Their editing style is what inspired me to get into editing my own YouTube videos.
Me. Colours not included.
Stick around and maybe you’ll learn something cool about me, or maybe I’ll teach you something cool about editing or video or…something. I’m new at this. I’ll get there. Baby steps.